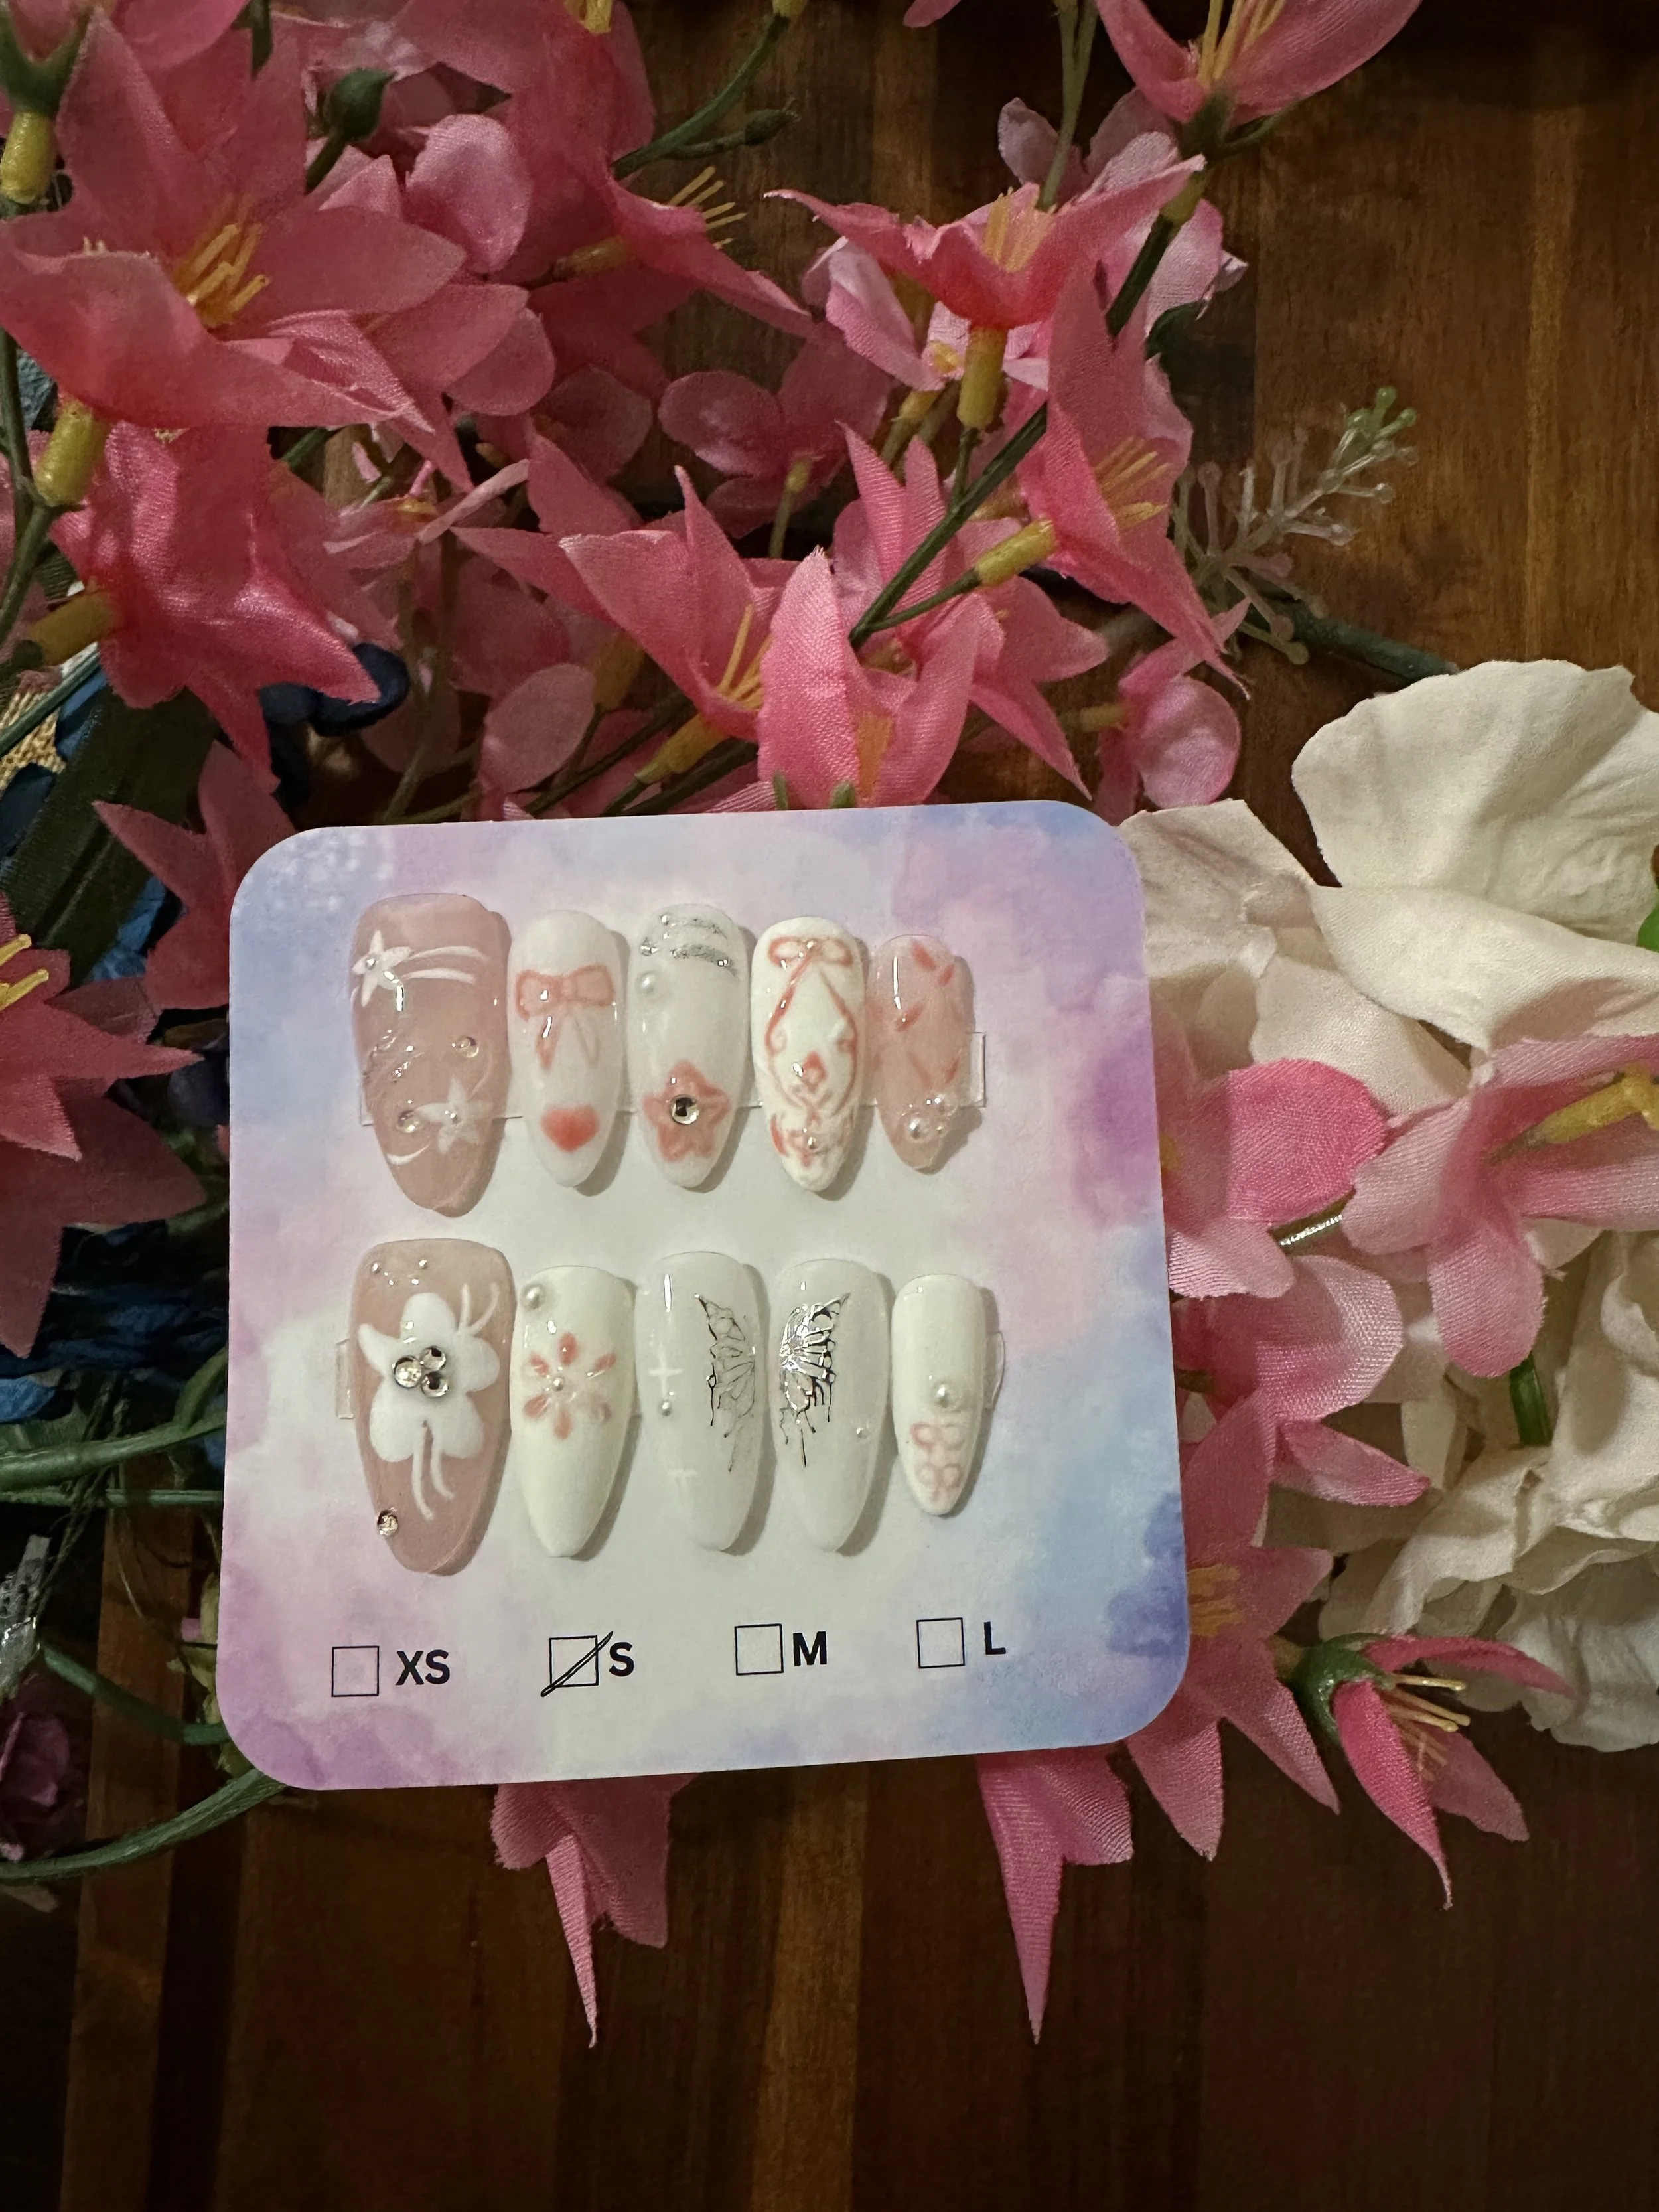
 Image 1 of 3
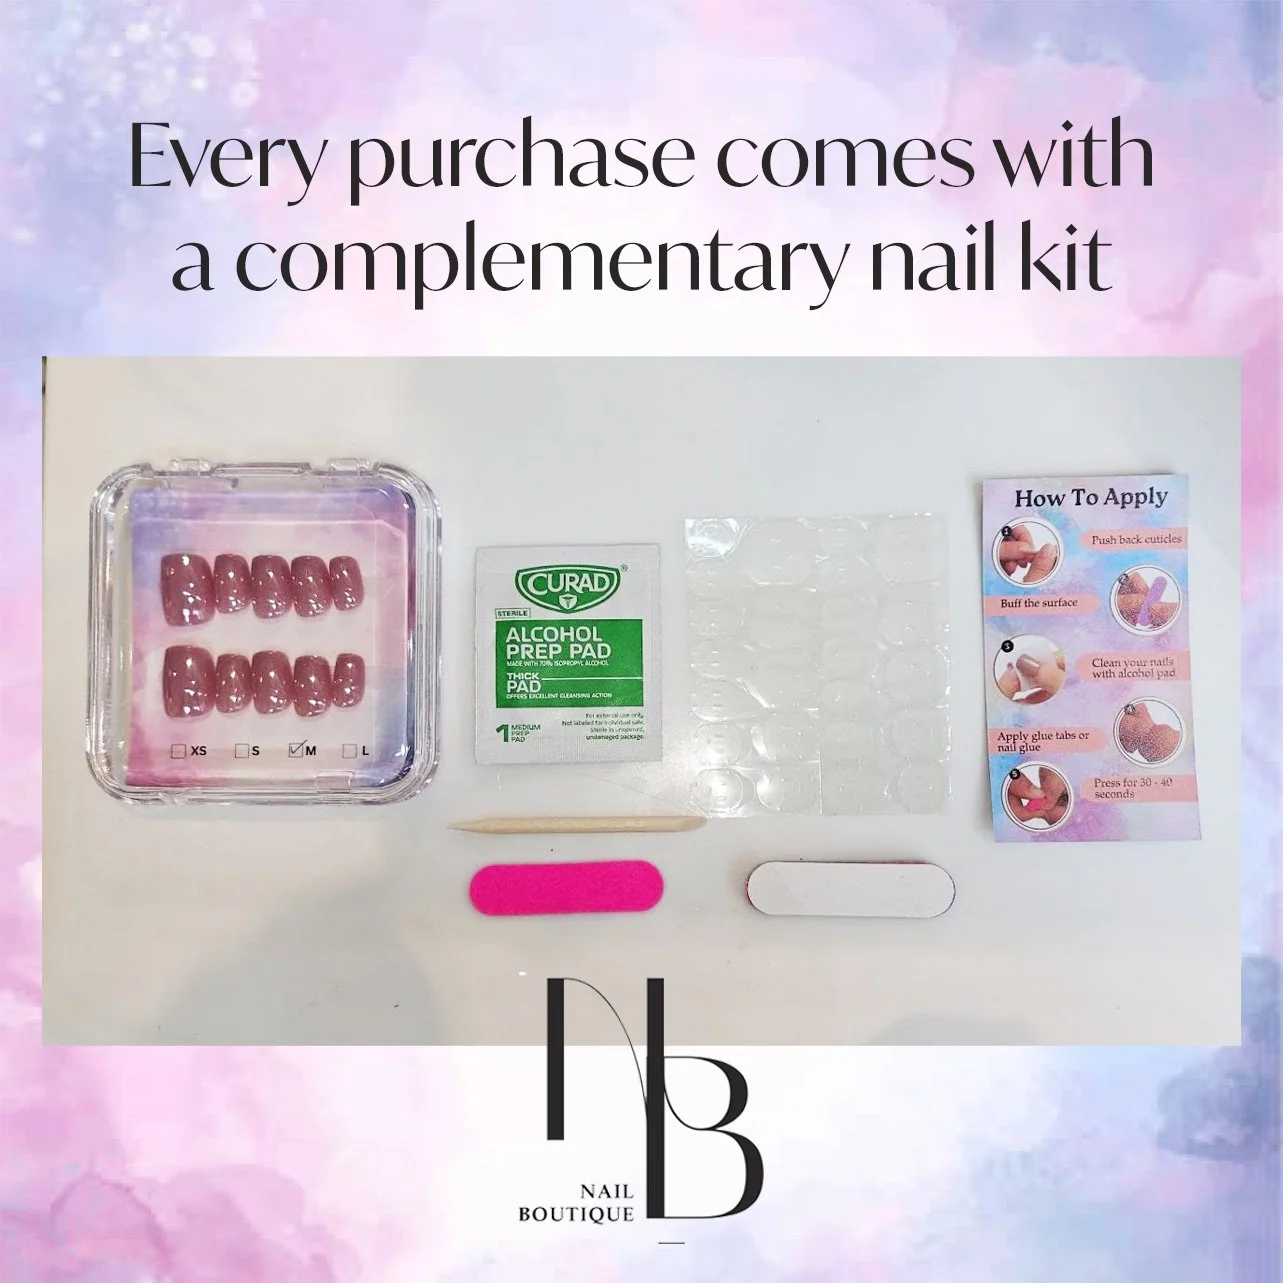 Image 2 of 3
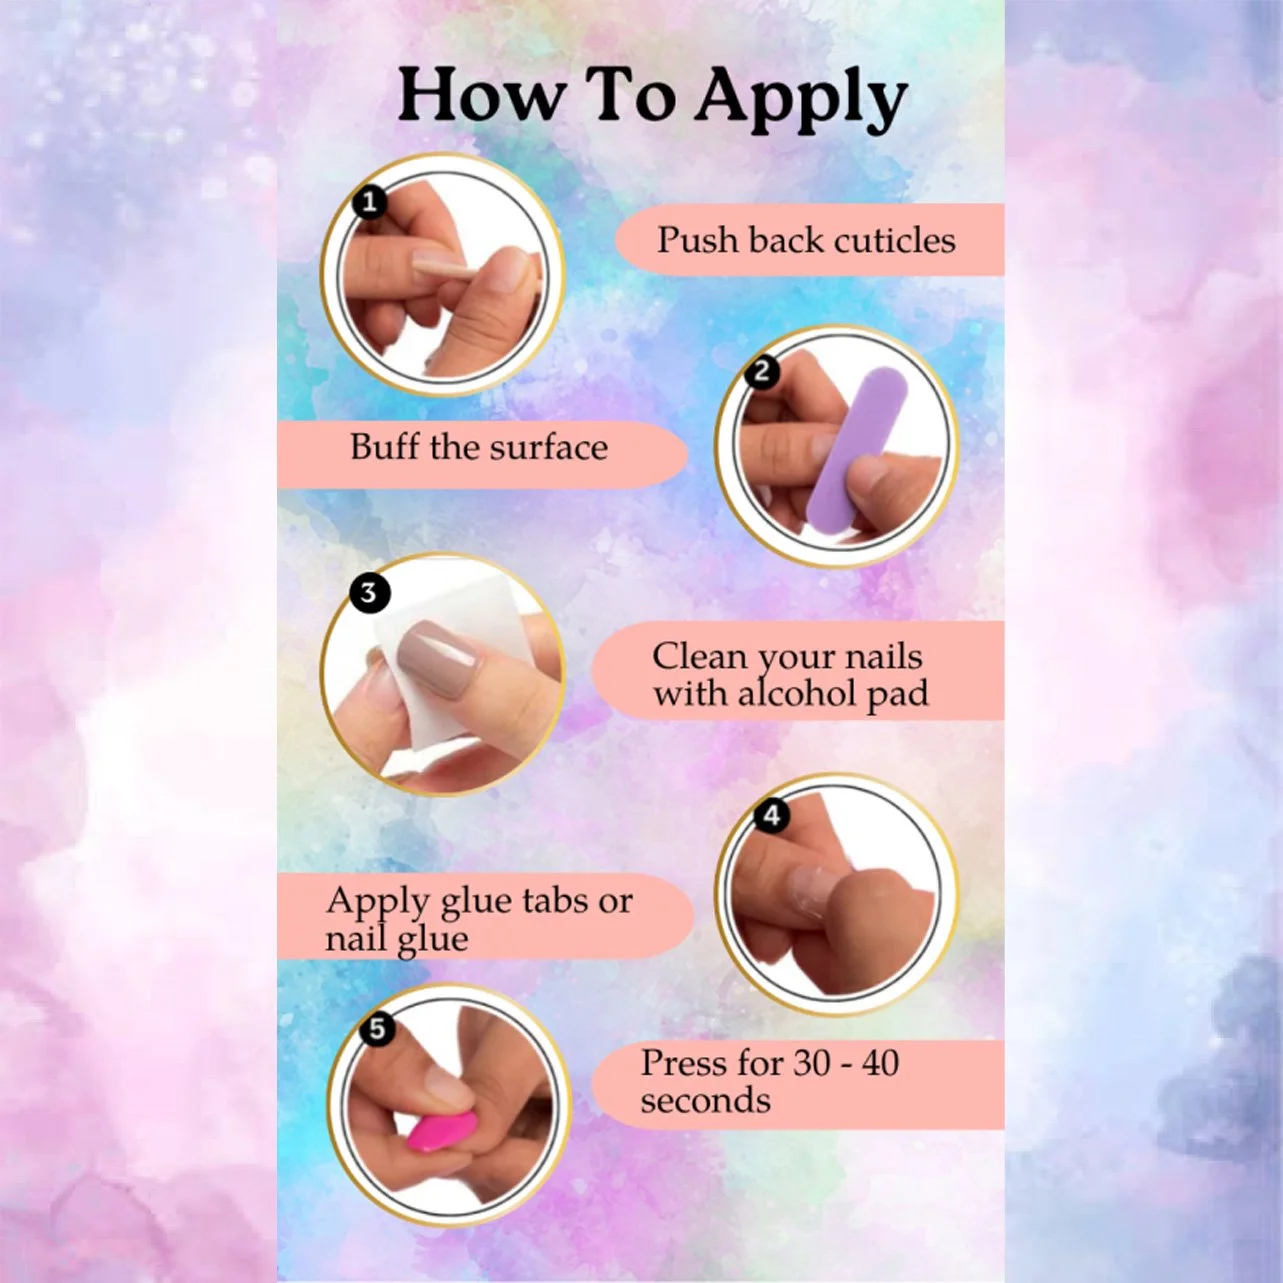 Image 3 of 3
Sizing Guide
When measuring between two sizes or having a flat c-curve in your nails, consider choosing one size larger, as adjustments can be made with the nail file.
Make sure to turn your finger to the side when marking or measuring, as angles can affect your measurements.
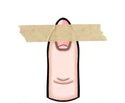
STEP ONE: Place tape over widest part of your natural nails

STEP TWO: Mark the tape with a fine permanent marker or pen
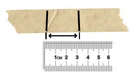
STEP THREE: Remove the tape and measure between the pen marks
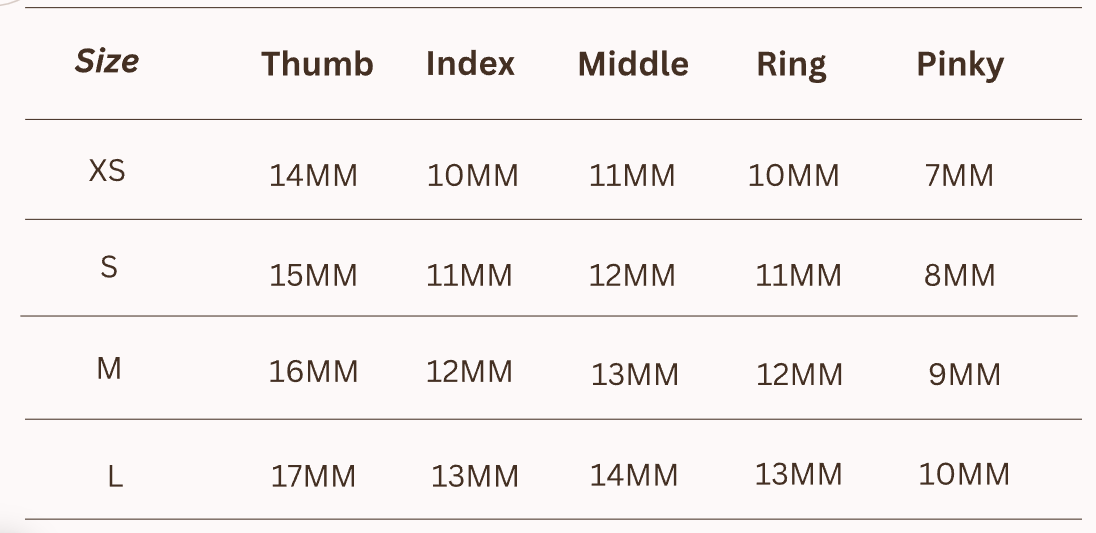
Size Chart
Please select a size that fits most of your fingers by referring to the sizing guide and chart.
Consider sizing up if you are between two sizes and have flatter nail beds
Contact us if you have questions or need custom sizes
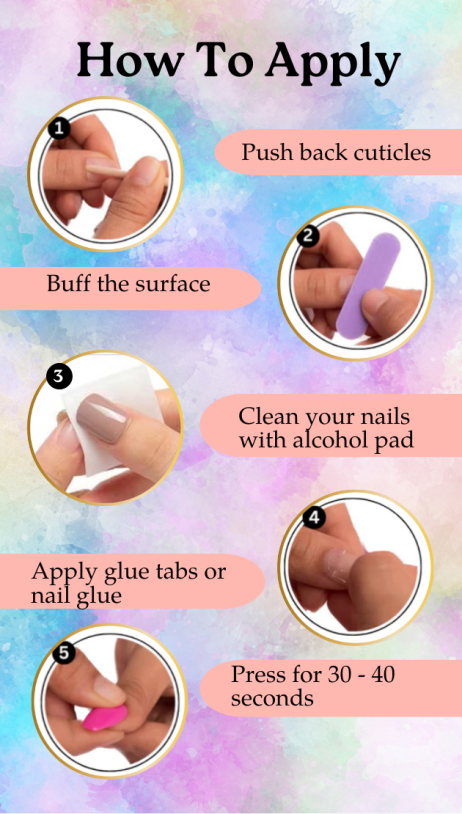
Application Guide
Step 1: Start with nail prep
The better you prep your nails and cuticles before applying your press-ons, the better your nails will look! Take your time to remove old nail polish and apply a cuticle remover if you wish.
Step 2: Push back your cuticles
Using a cuticle stick, carefully push your cuticles down towards the base of the nail bed. Do so gently to avoid damaging the surrounding skin.
Pro tip: Know the difference between the cuticle, which is largely made of dead skin, and the eponychium, which is the thickened layer of skin at the base of the nail. Avoid damaging the eponychium when pushing the cuticle back towards it.
Step 3: Buff and file the nail bed
Using the nail file and a back-and-forth motion, gently buff the surface of your nails. Buff just enough to remove the shine from your nails, using minimal pressure to avoid damaging the nail bed.
You can also take this opportunity to file down your nails. Your natural nails should be fairly short, without a free edge growing past your fingers.
Step 4: Clean and dehydrate your nails
Wipe your nails down with the alcohol pad included in the kit. The alcohol will clean your nails of oils, debris, and excess moisture, leaving the surface dehydrated. If needed, you can soak a cotton pad in rubbing alcohol and use that to wipe your nails instead.
Step 5: Apply glue
Starting with your first finger (ideally, the little finger on your less dominant hand), brush a thin layer of glue over your natural nail. Be careful to avoid getting any glue on the skin surrounding your nails. Brush a little more glue on the inner side of your press-on nail.
Or
Step 5: Apply sticky tabs
Select the appropriate adhesive tab size. Apply the adhesive tab onto your natural nail and press firmly making sure there are no air bubbles. Peel off the protective film carefully
Step 6: Apply your press-on nails
Line the bottom of your press-on nail with the base of your nail bed, holding the press-on at a 45-degree angle. Then, press it down against your nail firmly. Hold it in place for around 20 seconds.
Pro tip: We recommend working your way from your pinky finger to the thumb, applying one nail at a time to alternating hands. This will ensure that your pointer finger and thumb are the last nails you need to apply the press-on nails to.
After Care:
Finally, give your press-on adhesive at least 2 hours to dry before letting your hands get wet.
Try to avoid using your hands aggressively, and be careful not to bump your nails against anything.
For best results, we recommend putting on your press-on nails before bedtime so you can let the glue set overnight.
Removing Press on Nails
To remove your press-ons, soak your fingers for 15-20 minutes in a small bowl filled with warm water, a little bit of dish soap, and a skin-safe oil of your choice. The mixture will break down the adhesive and press-on nails will pop off easily. Then, carefully file away any glue remaining on your nails.